Connect to SQL on FHIR
You can use 1upHealth’s SQL on FHIR to get read-only access to the full set of your organization’s FHIR data. SQL on FHIR’s tabular format makes it easy for you to use the power and convenience of standard ANSI SQL to run a variety of queries.
To connect to SQL on FHIR and run queries against your FHIR data, you can use your preferred SQL client and business intelligence (BI) tools, such as DBeaver, Microsoft PowerBI, and Tableau. Before you can review your data and run queries, you must set up your SQL client and connect to your BI tool using the following instructions.
Security, Authentication, Authorization & Limits
The 1upHealth SQL on FHIR platform is HIPAA-compliant. Each environment is secured with multi-layer security, and an authentication and authorization architecture that is based on industry best practices. At 1up, we protect your data with the following strategies.
|
Strategy |
Description |
|---|---|
|
Network security |
Access to your SQL endpoint is restricted to users on your VPN using source IP policies |
|
Data protection |
Data is secured by server-side encryption at rest and in-flight |
|
Authentication |
Authentication requires individual user accounts with access keys and secrets, which are securely distributed |
|
Authorization |
Individuals are assigned to groups with the correct roles for their SQL access |
|
Query limits & logging |
Data scanning limit per query is 500 GB Data usage alert is set to 500 GB per hour |
Set Up Your SQL Client
You can use any SQL client that supports Amazon Redshift as a data source. The following instructions demonstrate how to configure the DBeaver client, which is a free SQL client for Windows, macOS, and Linux. 1upHealth does not have a partnership with DBeaver, or any of the tools mentioned in this topic.
Before you begin these instructions, make sure you have your access key and secret key.
Before You Begin
Before you start the process to configure your client, make sure that you have the details for the following configuration parameters.
Keep your personal access and secret keys in a safe location, and don’t share them.
|
Parameter |
Details |
|---|---|
|
JDBC Endpoint URL |
Provided by 1upHealth Example — |
|
Username |
Your personal access key, provided by 1upHealth |
|
Password |
Your personal secret key, provided by 1upHealth |
Set Up DBeaver
 Create your connection in DBeaver
-
Download the latest version of DBeaver from https://dbeaver.io/ and install it.
-
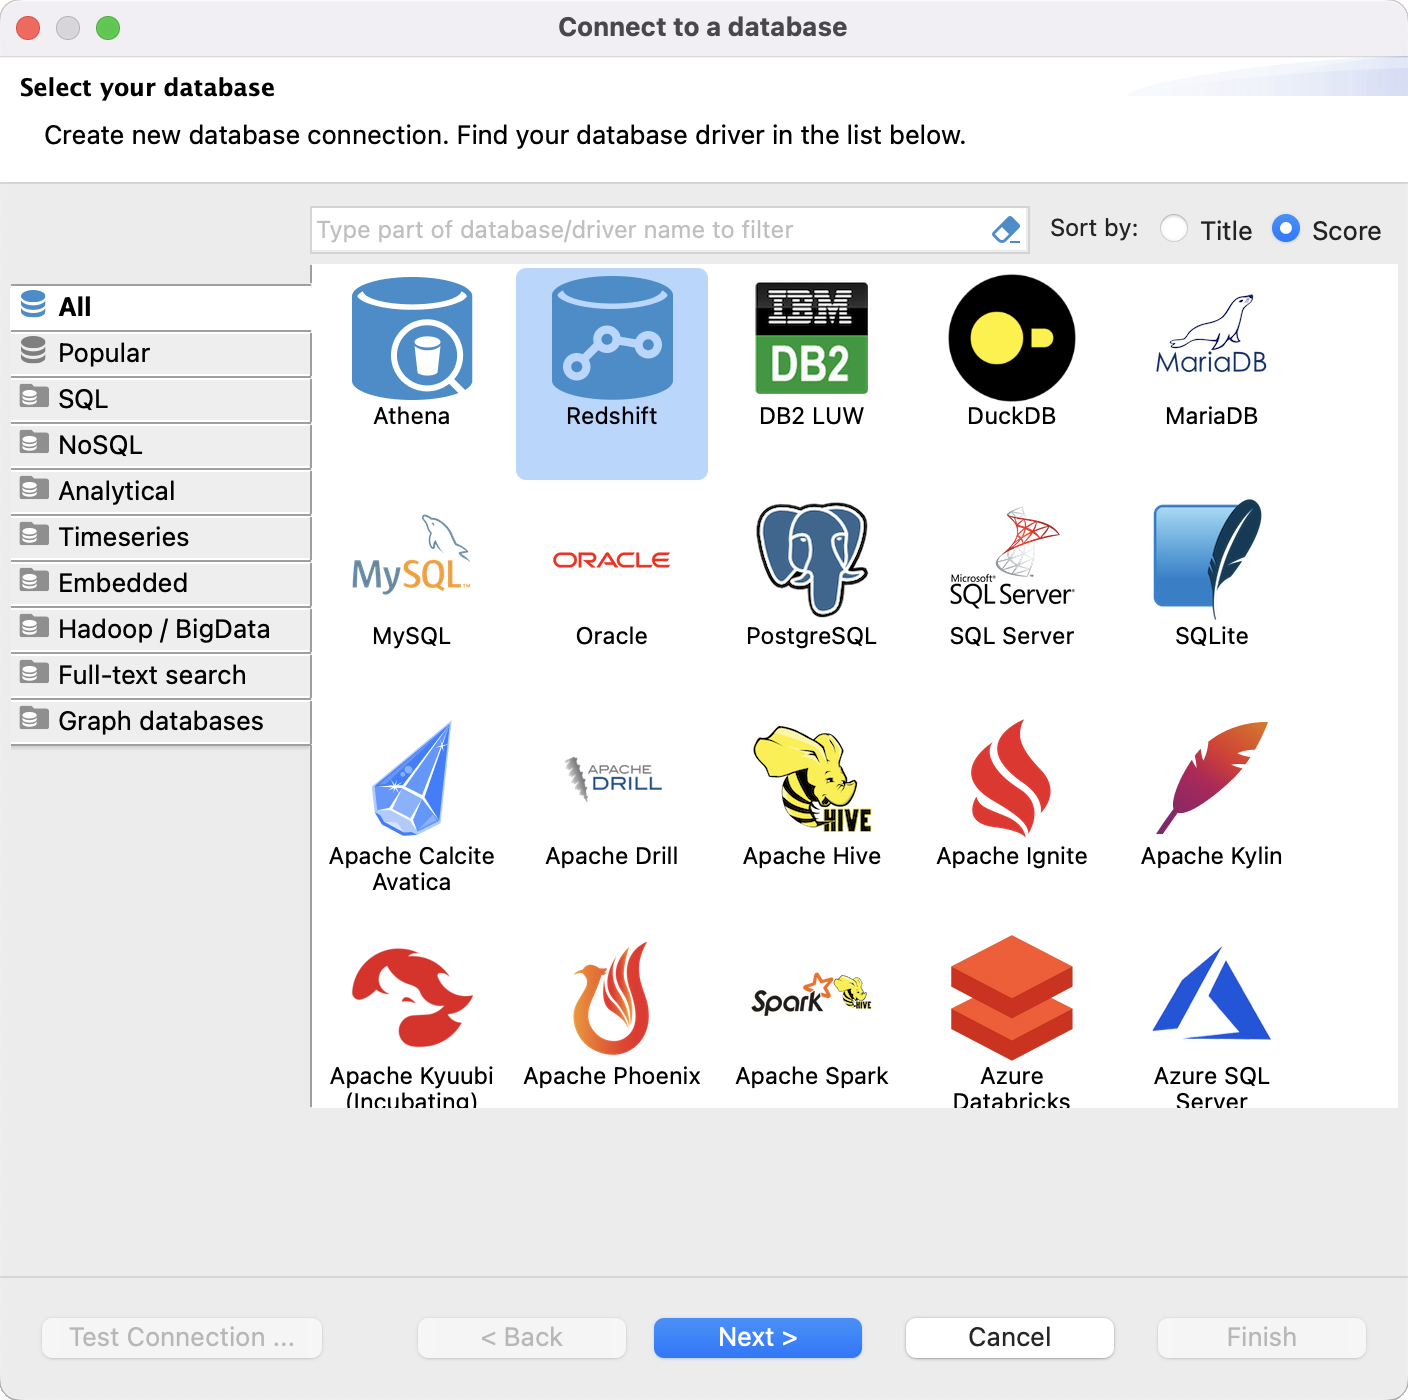
Open DBeaver and select .
The Select your database dialog box appears.
-
Select and click .
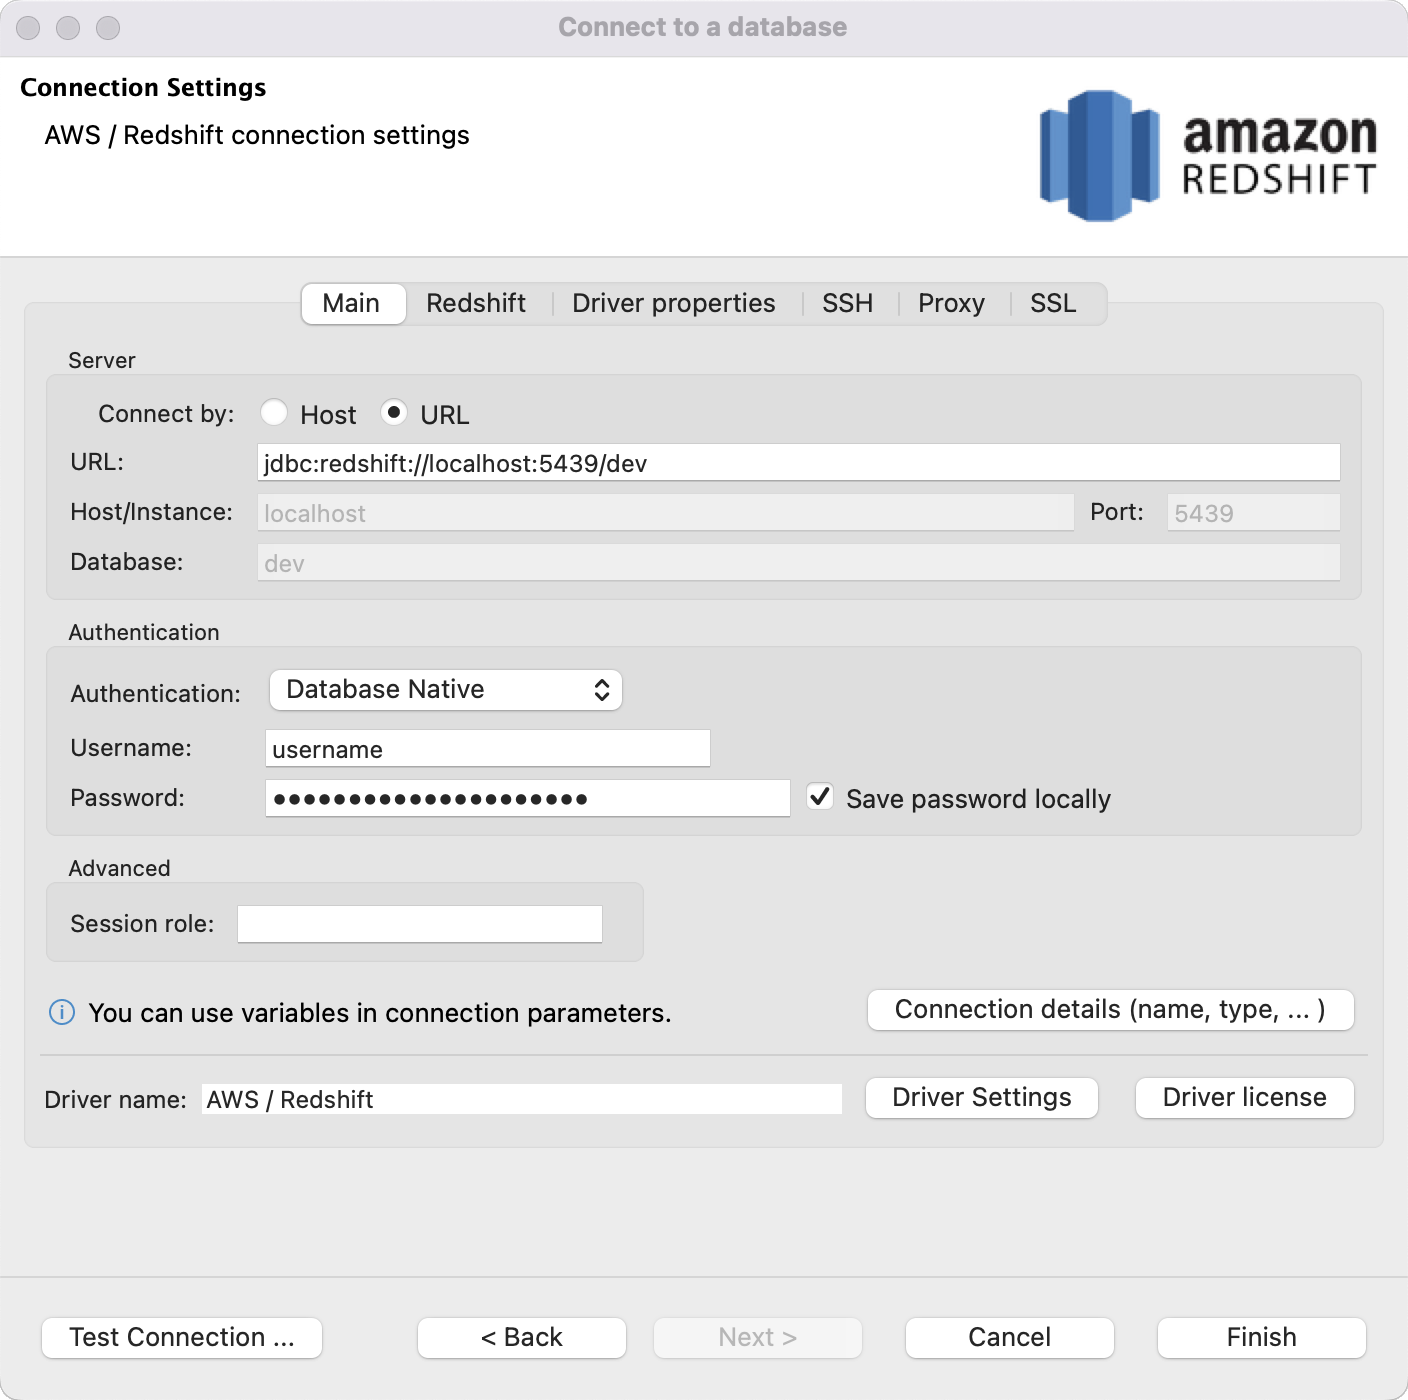
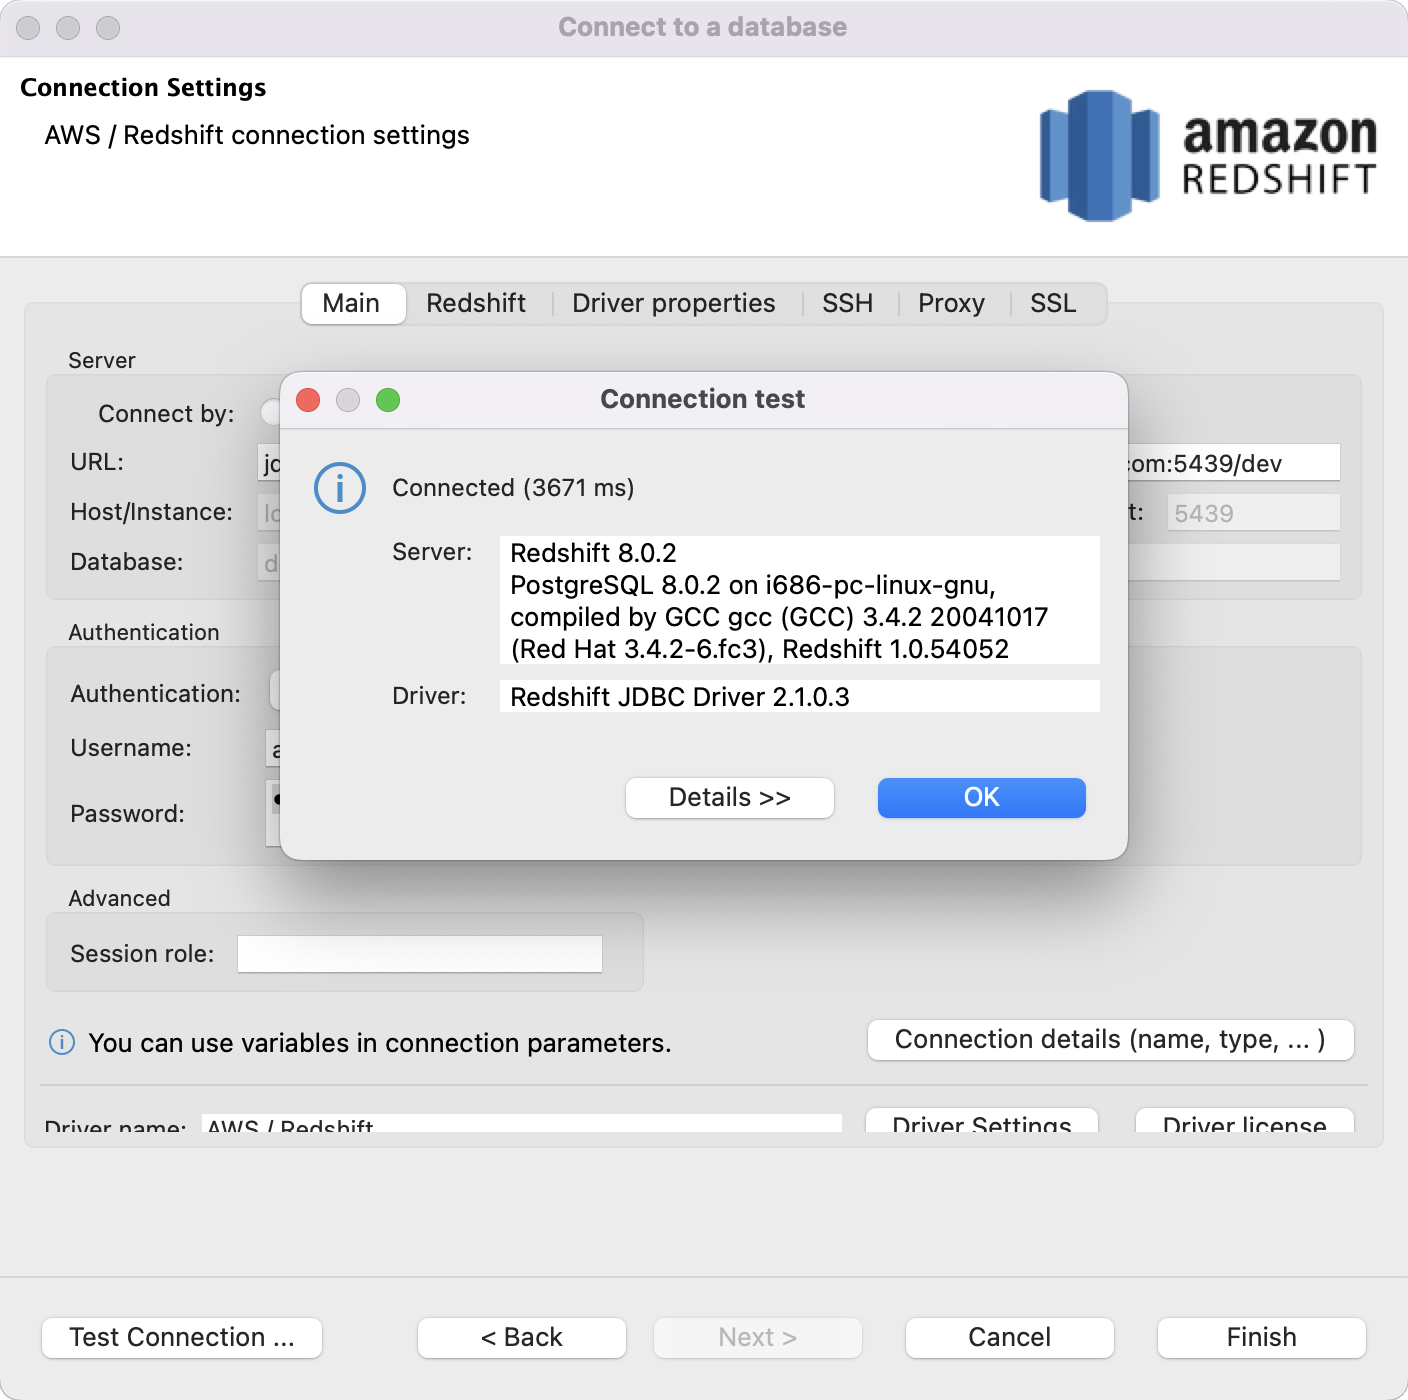
The Connection settings dialog box appears.
-
For the option, select .
-
In the text box, type the URL you received from 1up.
-
In the text box, type your access key.
-
In the text box, type your secret key.
-
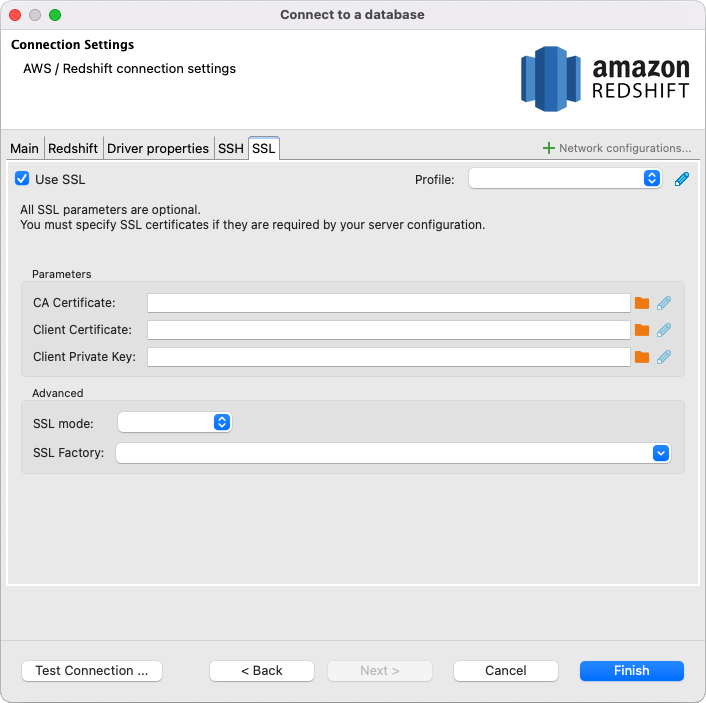
Select the tab.
-
Select the check box.
Specify any SSL parameters that are required for your SSL server.
-
Click .
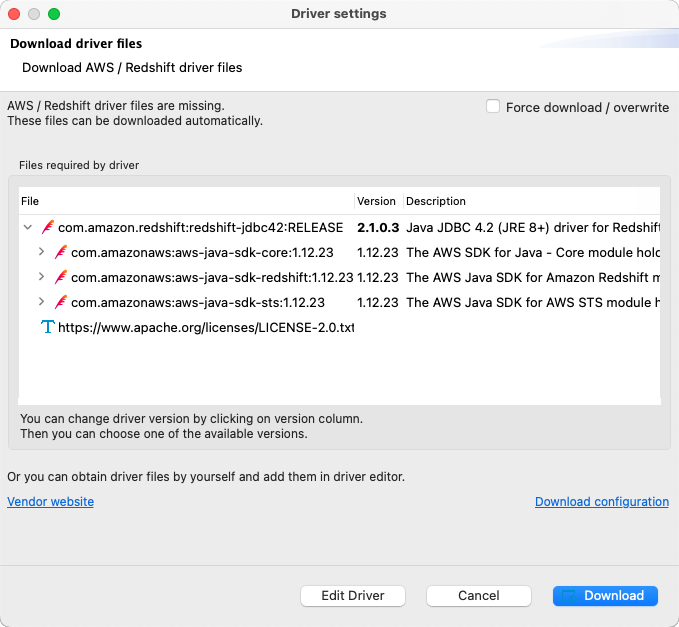
If you don’t already have the correct driver files, DBeaver will prompt you to download them.
A successful connection message appears.
If you don’t receive a message that DBeaver successfully connected to SQL on FHIR, verify that you specified the correct information in each step of this procedure.
Review Your Data and Run a Query
After you successfully establish a connection from DBeaver to SQL on FHIR, you can review your database information and run a query.
 Verify your DBeaver configuration and run a query
-
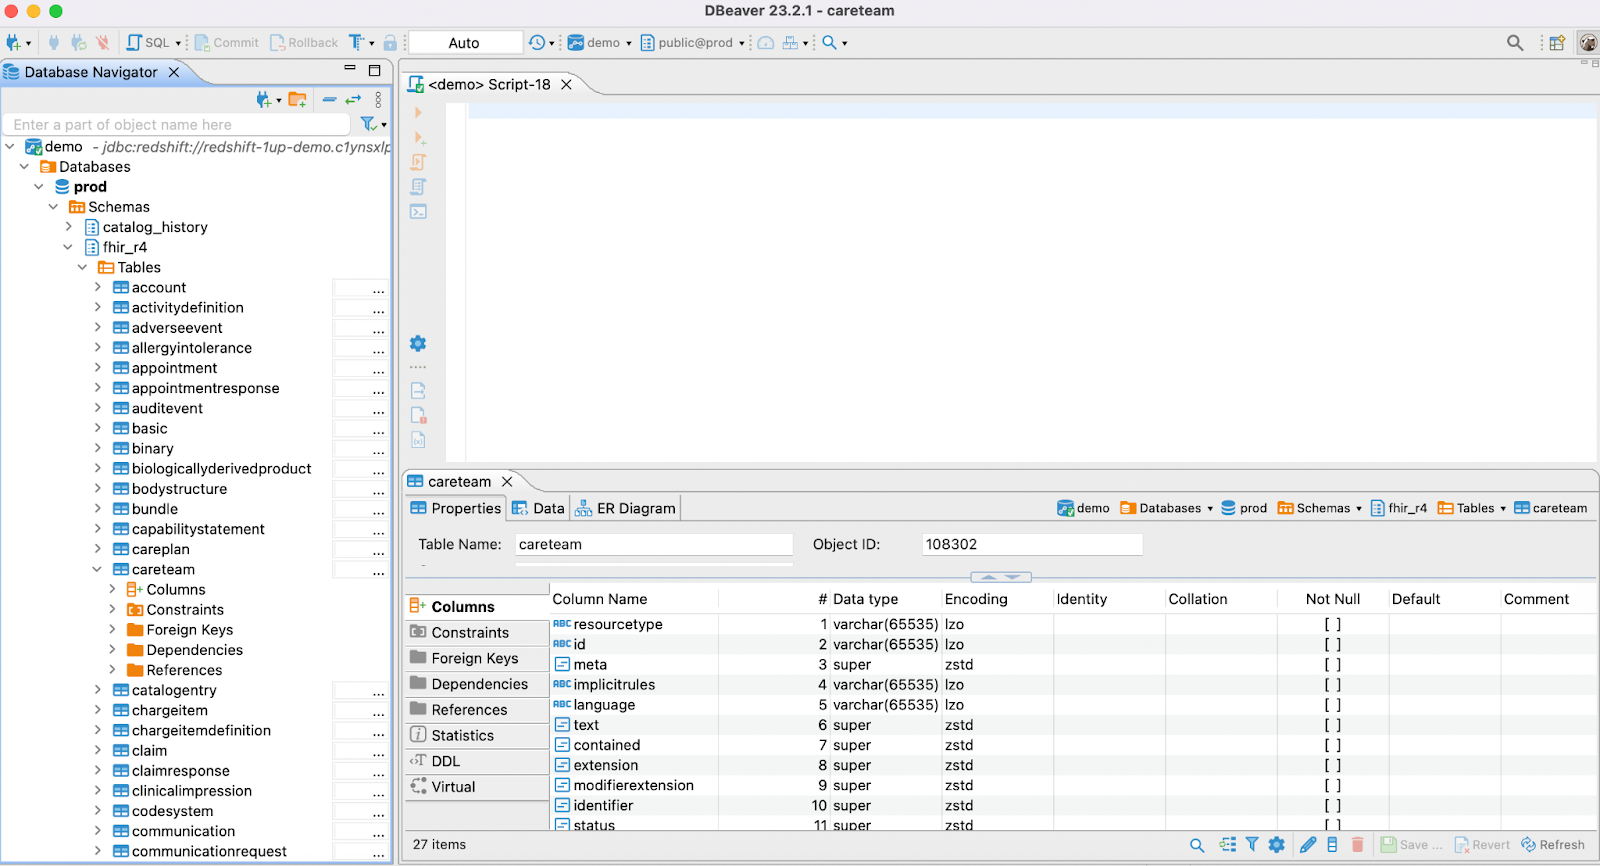
From the DBeaver left navigation pane, select the database connection you configured in the previous steps.
-
Select .
Your fhir_tables and any existing views appear.
-
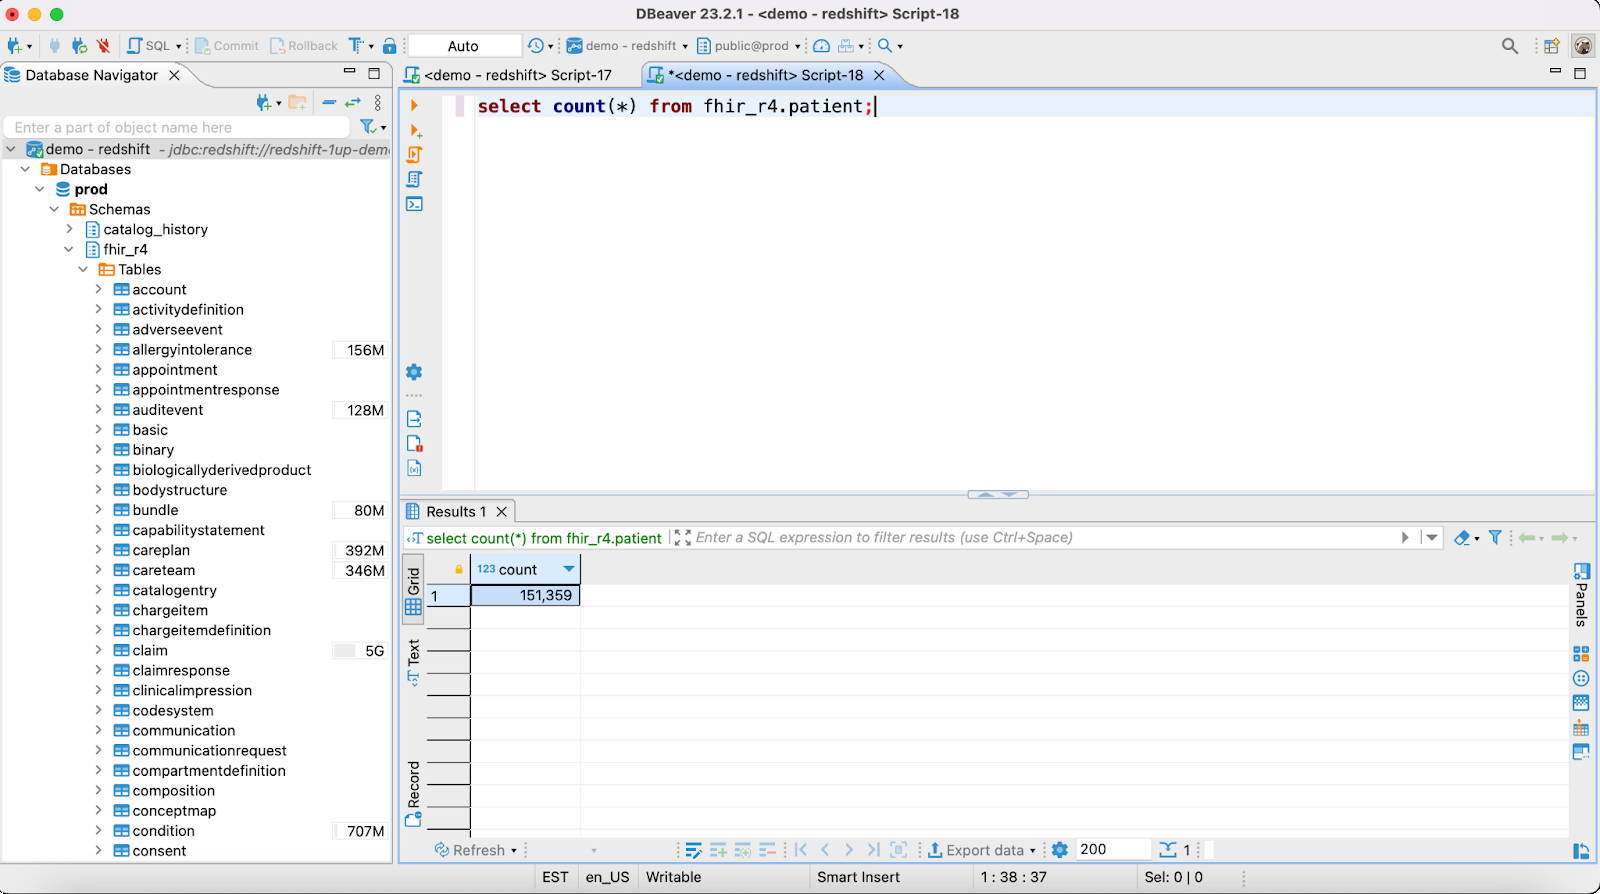
To run a query, from the SQL Editor menu, select .
-
In the top-right pane, select or press .
The query runs and the results panel appears below the statement.
For more information about how to use DBeaver, see the DBeaver User Guide.
Connect to Business Intelligence Tools
You can use your preferred business intelligence (BI) tool to review your FHIR data. Two common tools that 1upHealth customers use are Tableau and Microsoft PowerBI. Before you can use these tools to review your data, you must configure them to connect to 1upHealth SQL on FHIR.
Set Up a Connection to Tableau
When you configure Tableau to connect to SQL on FHIR, you specify the server information for the Amazon Redshift instance, your username, and your password. This is the same information you specified when you configured your SQL client. As with all SQL on FHIR connections, you must connect from a previously allow-listed IP address, which is usually provided by a corporate VPN.
Before you can connect Tableau to SQL on FHIR, you must have Java and the Amazon Redshift JBDC driver installed on your computer.
If you don’t have Java or the JBDC driver installed, you can download them from the following links.
Configure Tableau
To configure Tableau to connect to SQL on FHIR, you must connect your Tableau server to the 1upHealth instance of Amazon Redshift. For more information, see Amazon Redshift in the Tableau Help.
 Set up a connection to 1up’s Redshift instance
-
Open Tableau and from the menu, select .
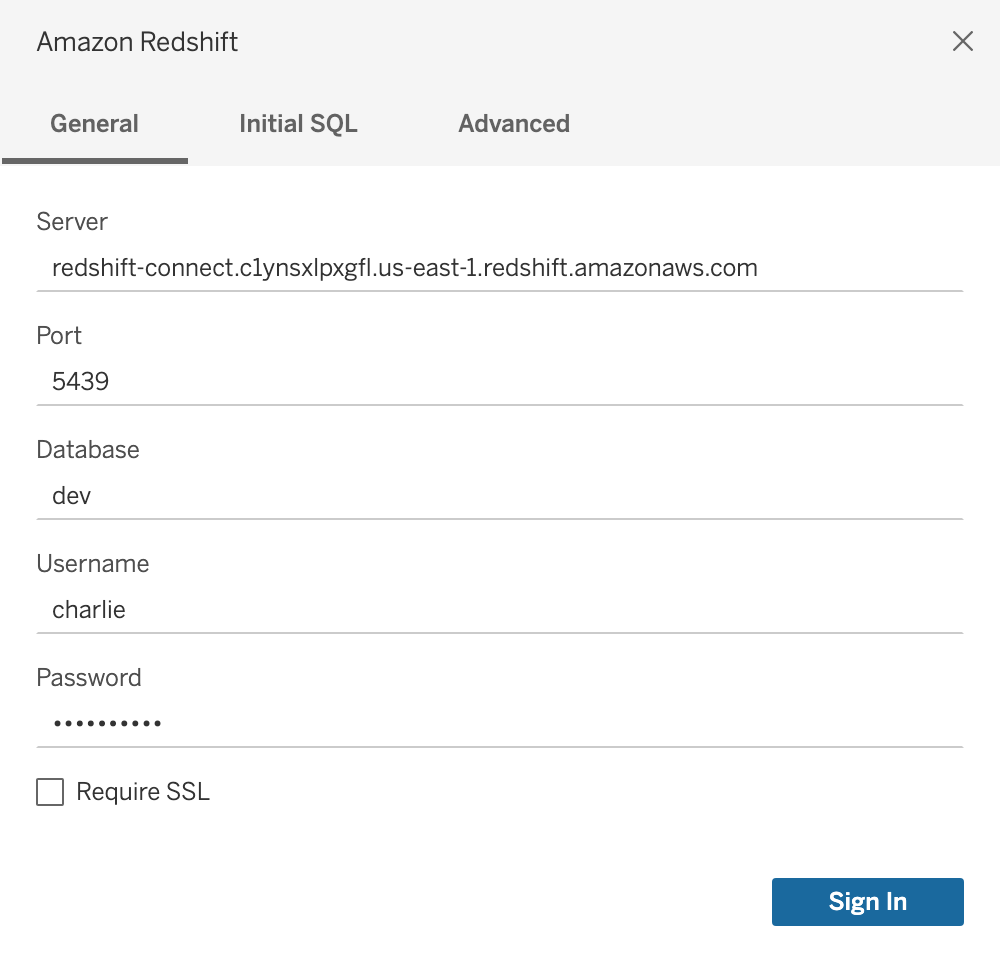
The Amazon Redshift connection dialog box appears.
-
In the text box, type the URL for the Redshift JDBC Endpoint.
Example — jdbc:redshift://endpoint:port/database
-
In the text box, verify that the port is .
-
In the text box, type prod.
-
In the text box, type your user name.
-
In the text box, type your password.
-
Click .
You should now be able to review your SQL on FHIR data in Tableau.
Set Up a Connection to Microsoft Power BI
You can also use Microsoft Power BI to connect to SQL on FHIR. As with all SQL on FHIR connections, you must connect from a previously allowlisted IP address, which is usually provided by a corporate VPN.
Microsoft Power BI runs only on Windows. For information about the system requirements for Power BI, see Hardware and software requirements for installing Power BI Report Server.
Configure Microsoft Power BI
Microsoft Power BI includes built-in connectivity for Amazon Redshift, which powers SQL on FHIR.
 Connect Microsoft Power BI to SQL on FHIR
-
Select .
-
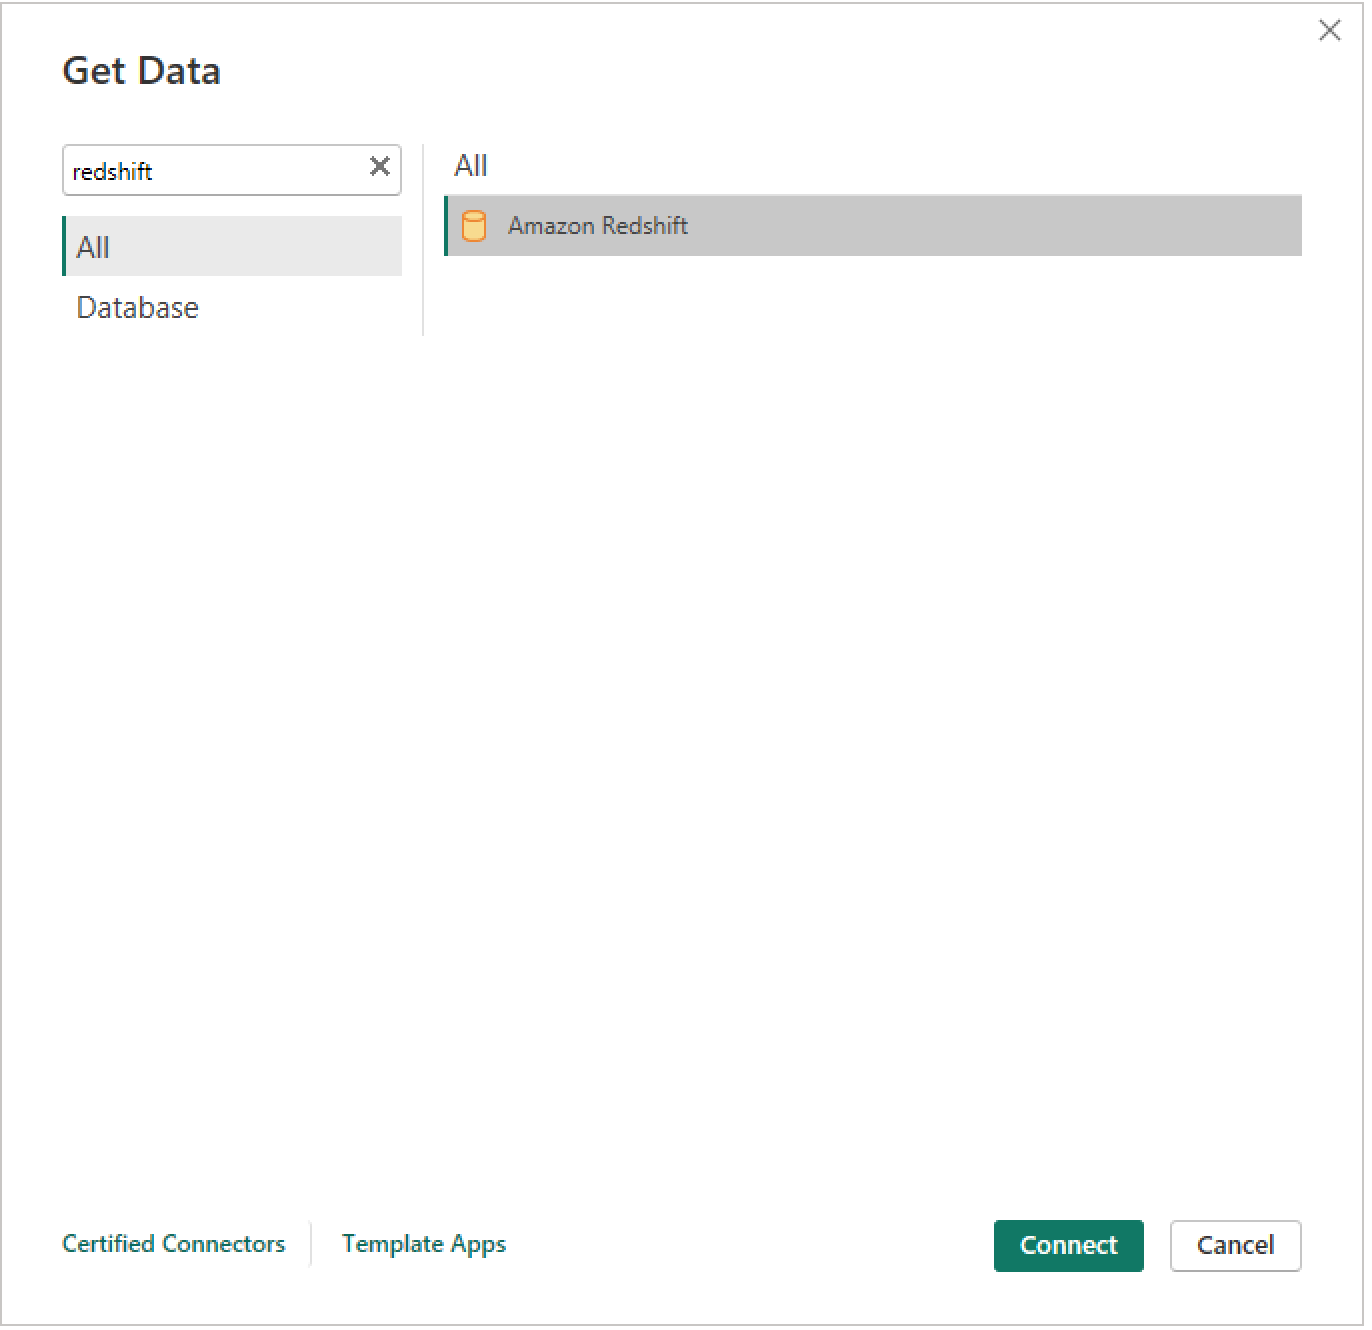
To see the full list of data sources, in the list of common data sources, click .
-
In the search text box, type Redshift.
-
Select and click .
-
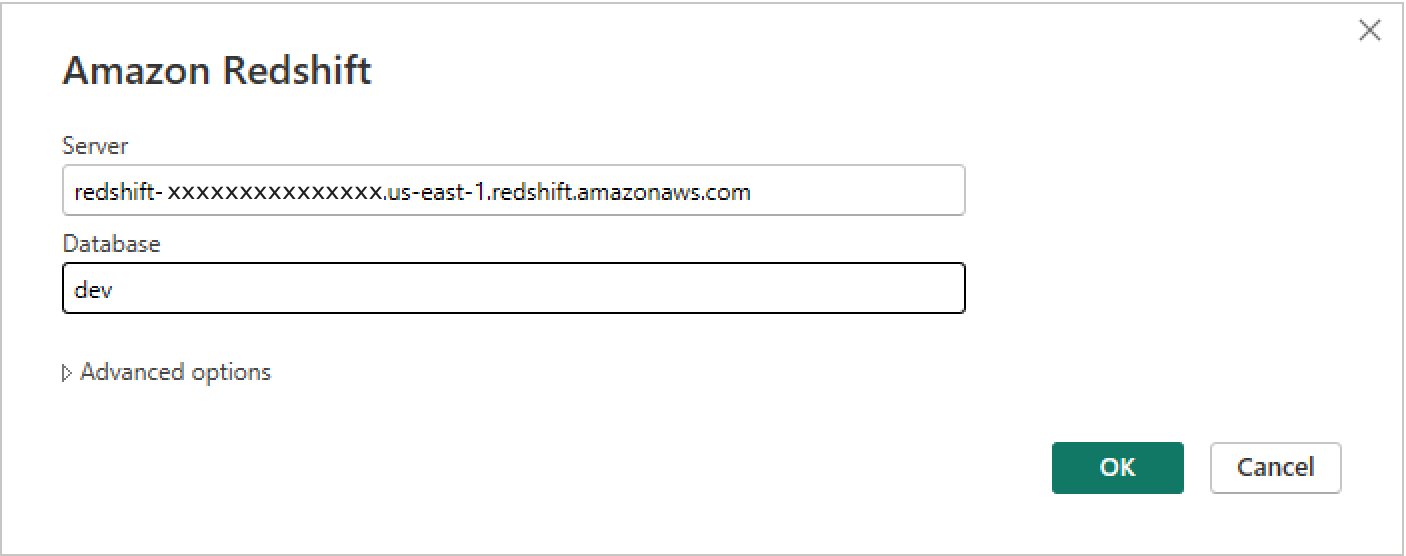
In the text box, type the endpoint URL that your account manager provided.
Don’t include the port or database information.
-
In the text box, type the database name.
-
Click .
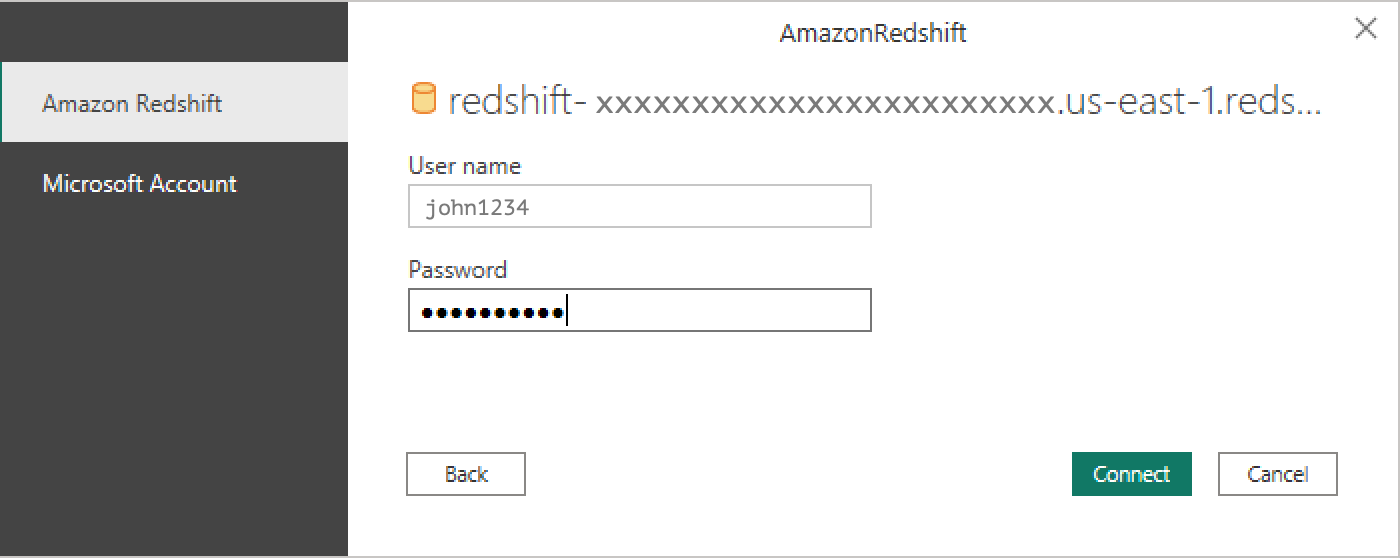
The Amazon Redshift authentication page appears, with Amazon Redshift as the selected authentication method.
-
In the text box, type your user name.
-
In the text box, type your password.
-
Click .
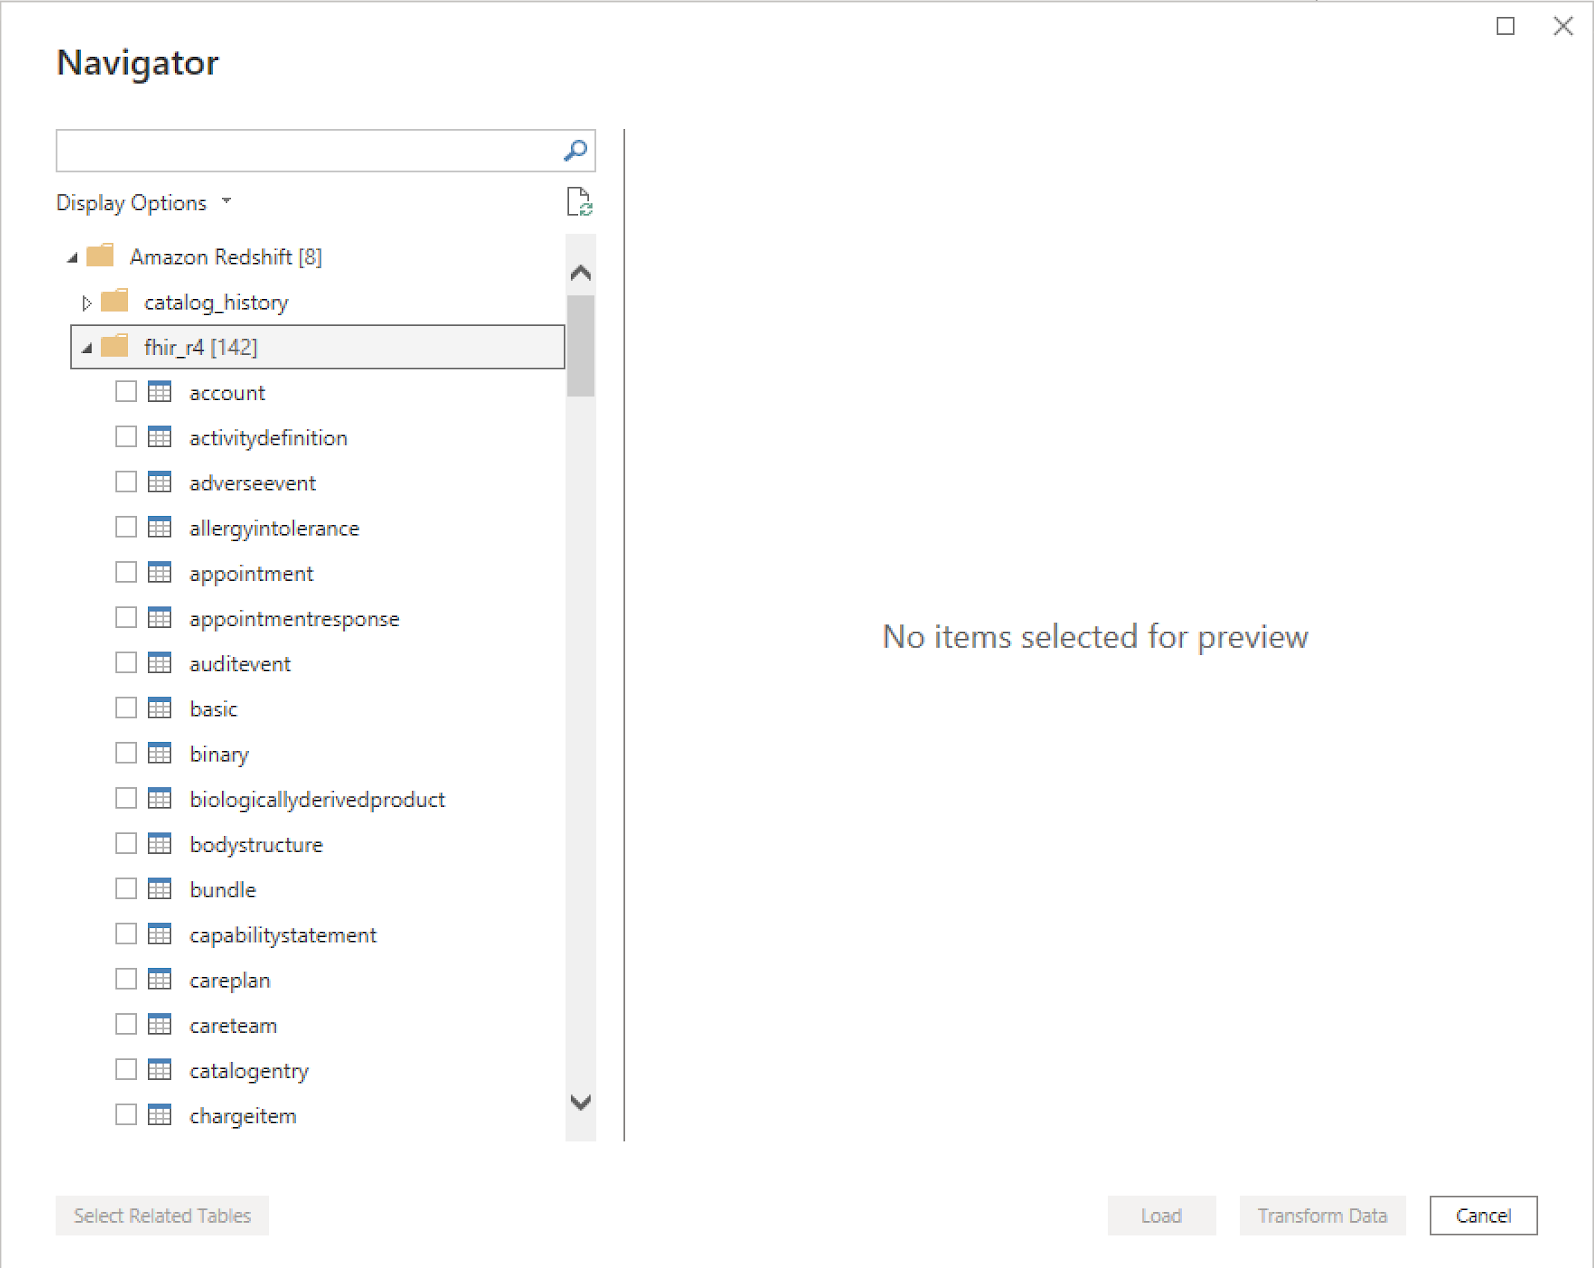
The Navigator appears.
You can use the Navigator to browse the Amazon Redshift data source and the tables included in that data source. You can also use Power BI to browse data and create reports of that data.
For instructions to create reports, see Create reports and dashboards in the Power BI documentation.
